Preserving Corn (freezing and Canning)
Nut and Bolts:
Canning and freezing corn is relatively easy, which is why in the summer, when Lewis Orchard, a farm stand near my home, has second boxes of corn, I get one. They are inexpensive, and I can get several pints of corn canned and a few pounds of corn frozen.
My Thoughts on Preserving Corn:
1. Freezing corn is easy. You just blanch the corn, place it in a bag, and stick it in the freezer.
2. I can corn because I like it on salads, and it saves on freezer space
3. You cannot use the water bath canning method to preserve corn. You must use the pressure canning method.
4. Canning Risk factor Low. This is a Ball and NCFHP recipe.
Method:
If you plan to can your corn, prepare your canning equipment and your kitchen; see Canning 101 and Canning 201 for more tips for your mess. All you will need is corn on the cob and water.
Freezing corn is easy and will keep for a year in your freezer. It is easier than canning corn. The procedure is the same for canning corn as it is for freezing corn.
So, start with as much corn as you want to freeze or can. A good rule of thumb is about 8 medium corn cobs for a quart of kernels.
Important tip: This rule of thumb is ok. It is more like an educated guess which is why I can and freeze corn on the same day. I always end up with more corn than I can fit in a jar. So, I just freeze what is left over.
Start by husking the corn and getting rid of as much of the silk as possible. Inspect the cob to see if it has some rotten kernels or if there are many immature kerns, then discard those cobs of corn. I cut the tip of the corn off, which has the smaller, immature corn kernels on it. Then I cut off the stalk side of the cob as well. I keep doing this until all the corn has been cleaned and is ready to be blanched.
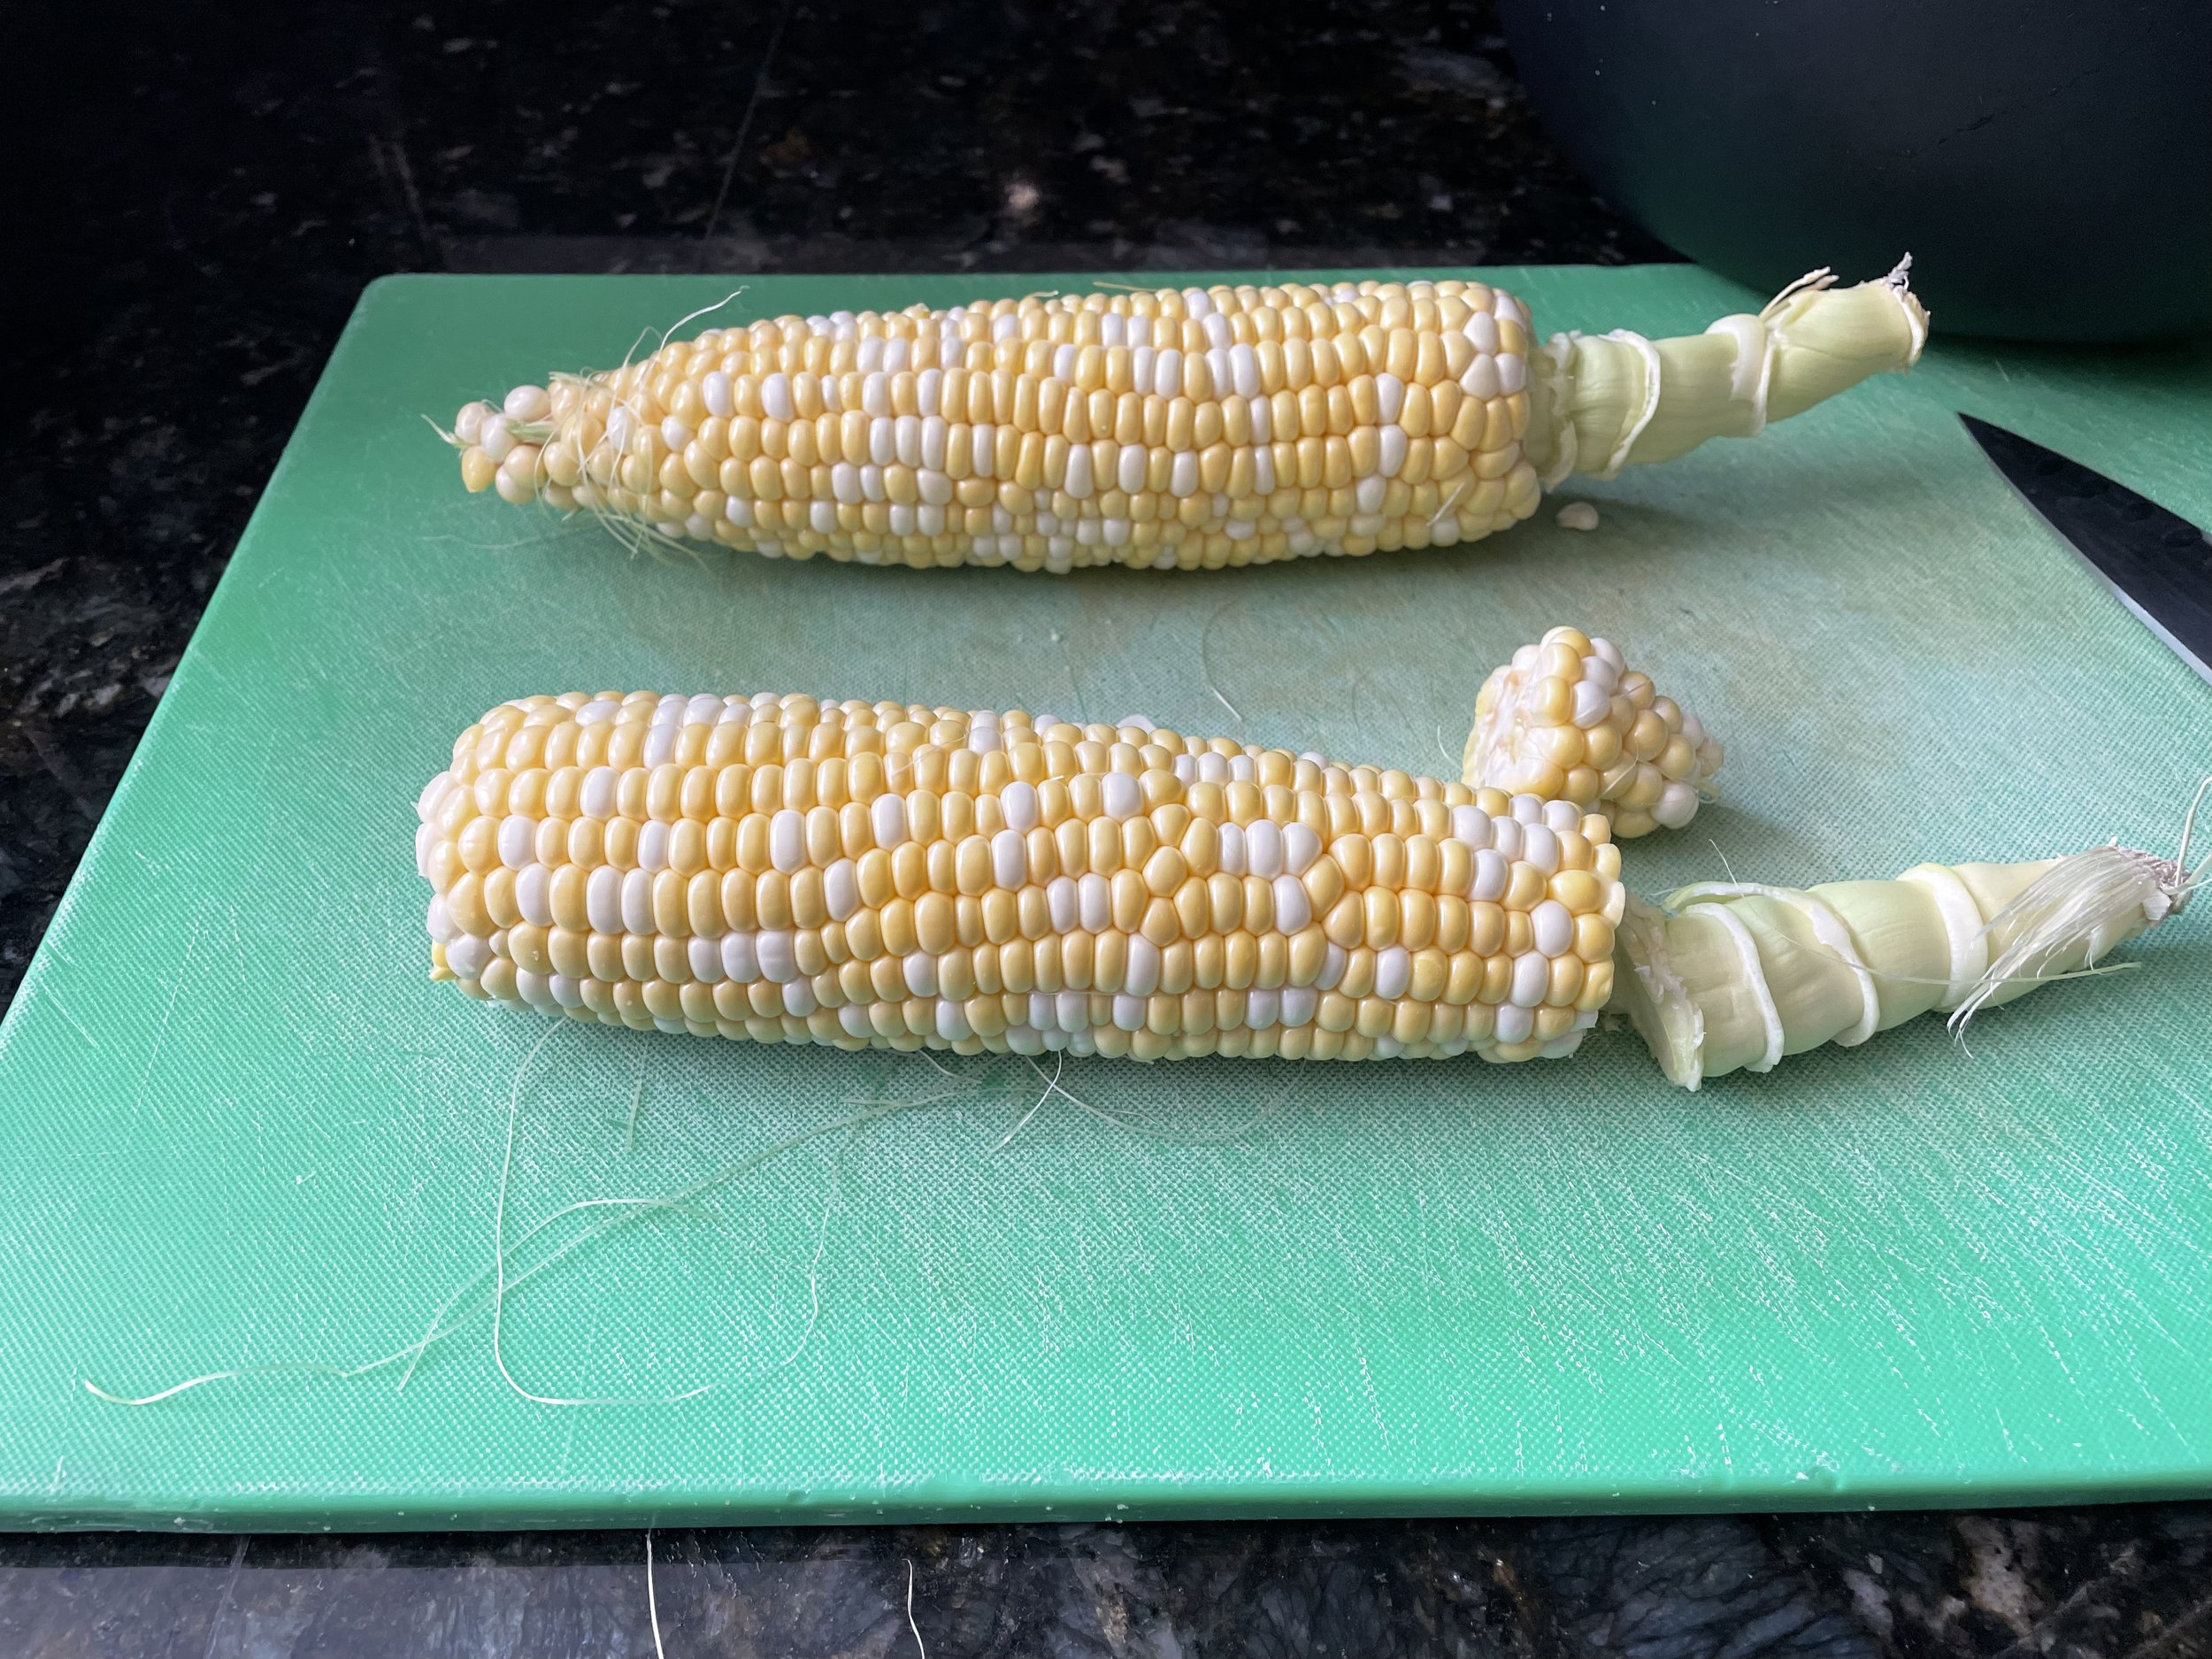
Corn cobs are prepared for blanching. The cob in front has both the tip and the stalk end removed.
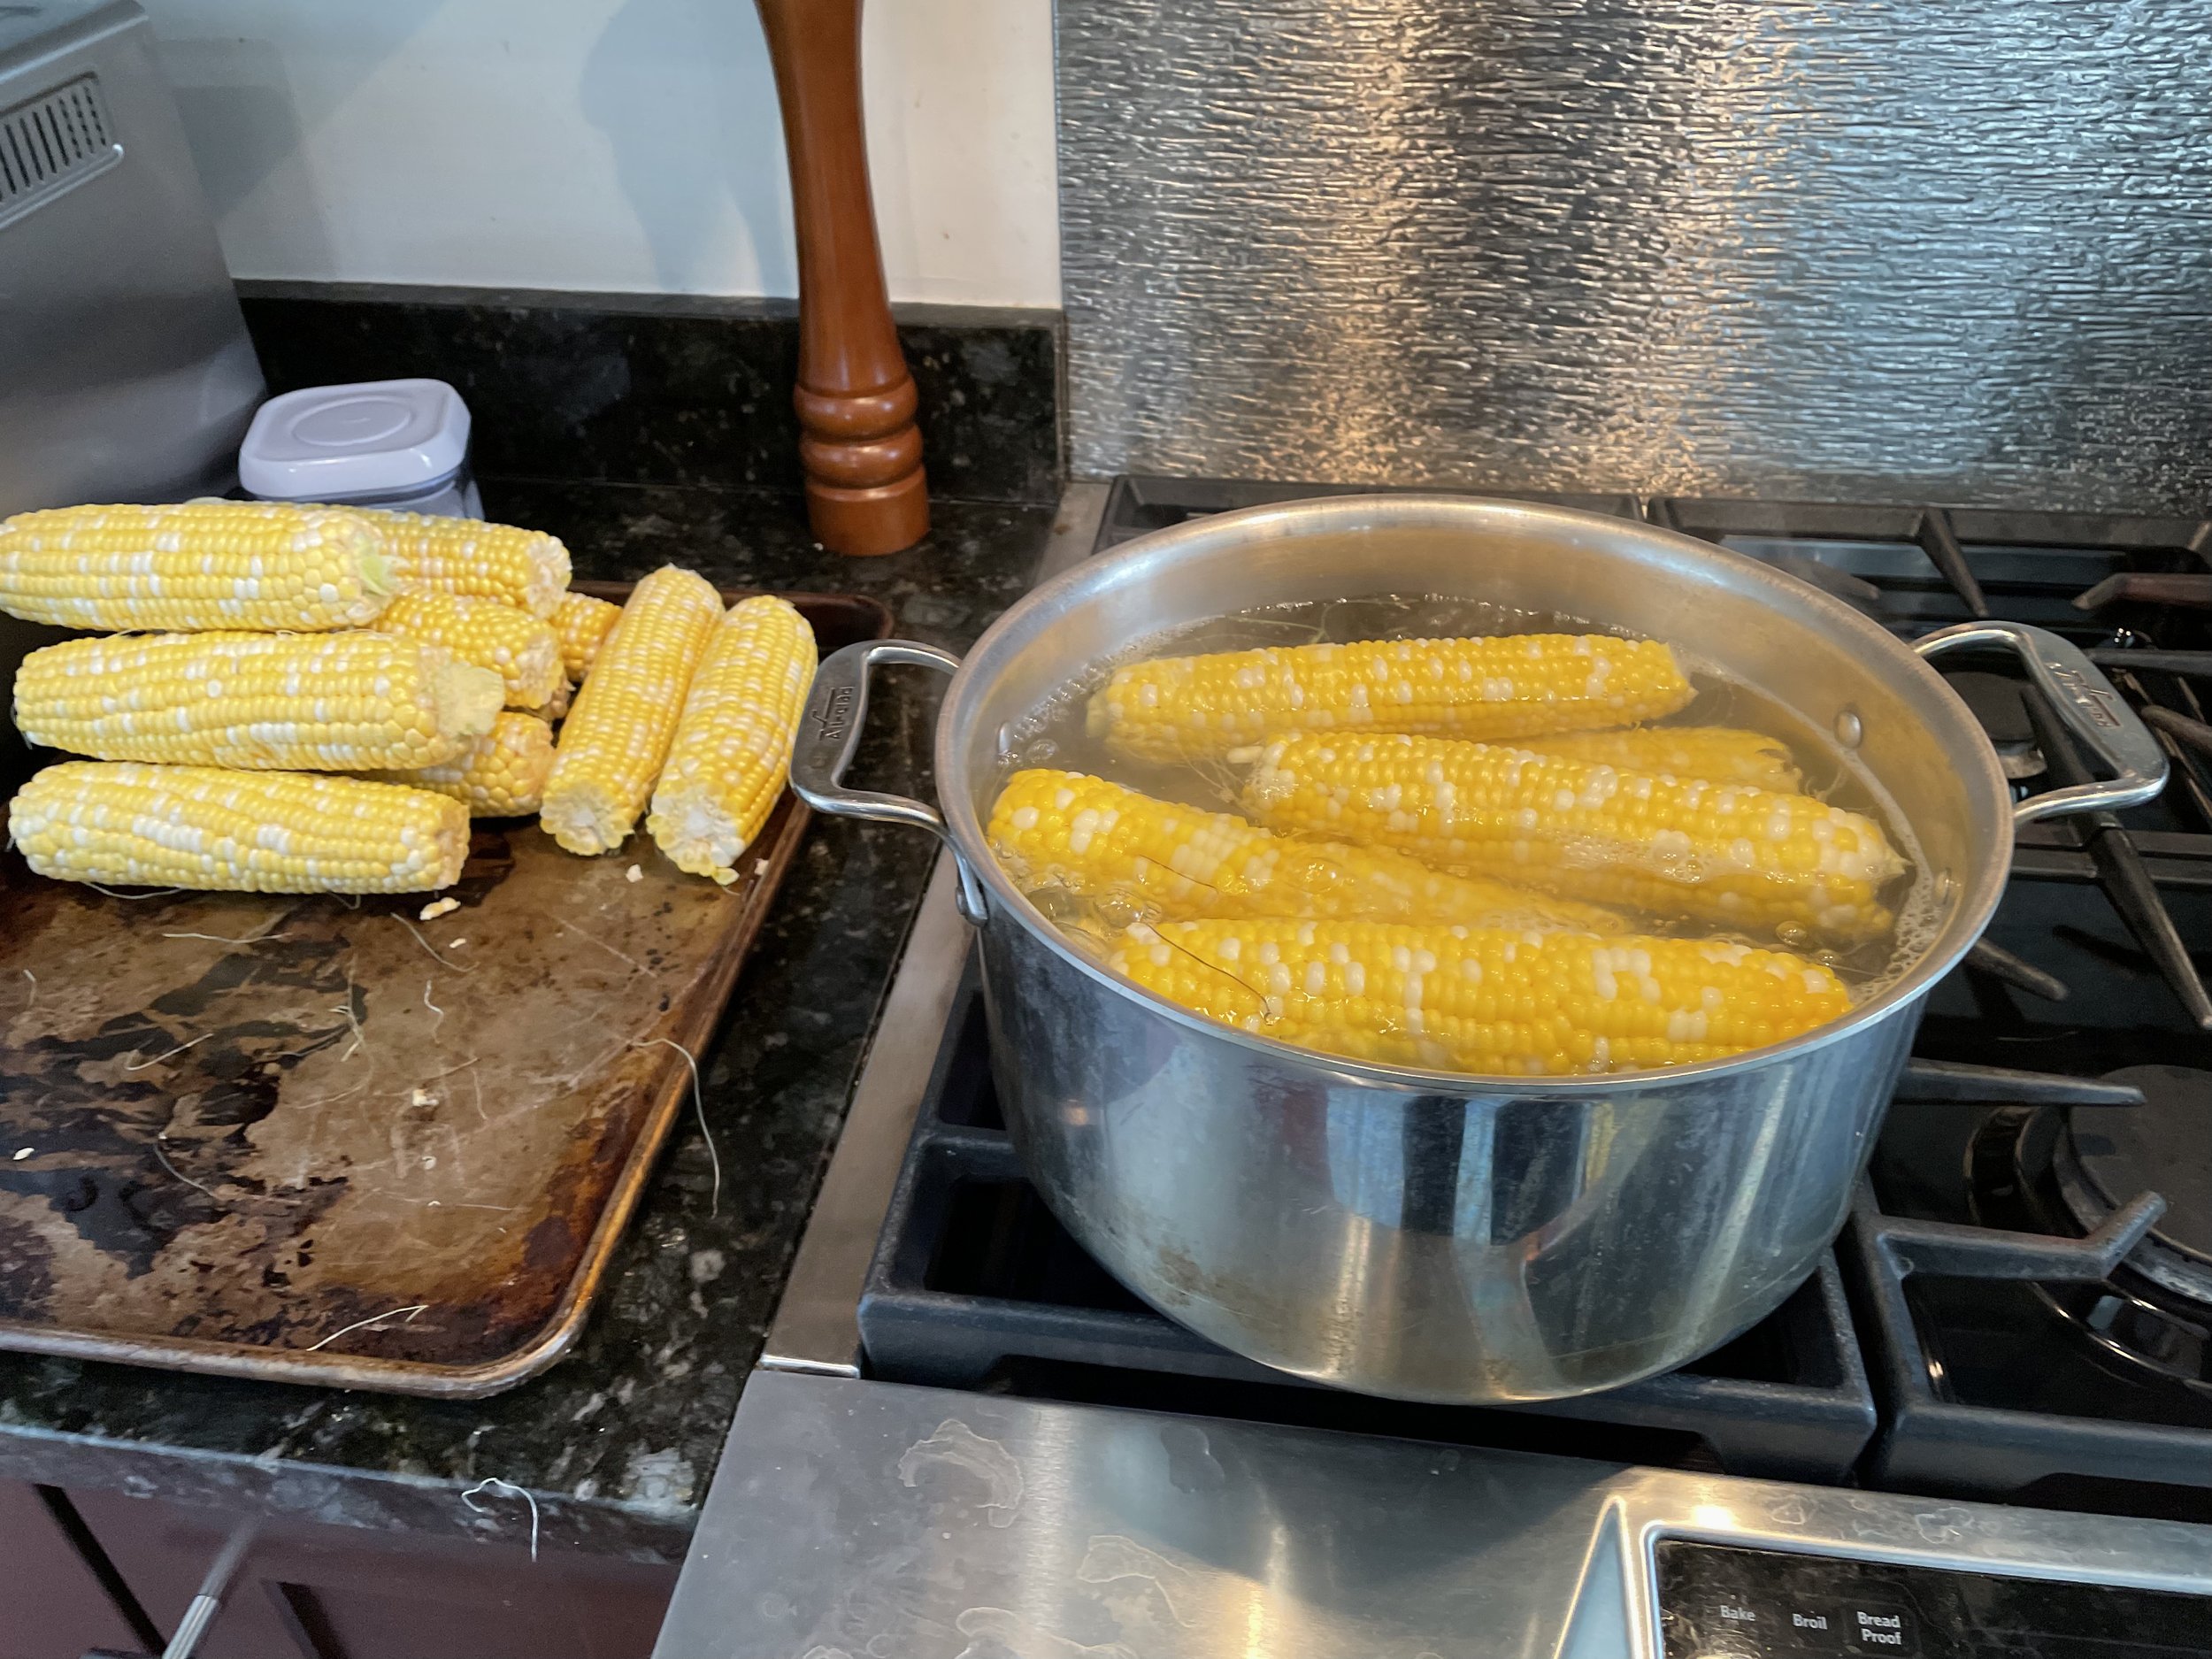
I like to make an assembly line to blanch the corn. I start by bringing a stockpot filled with water to a boil over medium-high heat. Next, I fill a large bowl with ice and water for an ice water bath. Finally, I set up my corn cutting station, where I put a smaller bowl in a larger bowl that catches the corn.
Important tip: I like to use a wide bowl with low walls to catch the corn because it is easier to cut the corn off the cob. I like to use a small bowl with a foot and slightly slanted sides for the inner bowl.
Blanching Corn.
Once the water is boiling, place a few cobs in the stockpot and blanch for three minutes, and then remove corn to an ice bath to cool. When the cob is cool enough to work with, place the cut tip of the corn on the smaller bowl, balancing it on to ensure the cob does not slip. Then using a chef's knife to cut the kernels off the cob. Do not scrap the cob. You only need ¾ of the kernel from the cob. Continue doing this until you get most of the kernels are off all the cobs.

Cutting the corn off the cob. Left: The little bowl in the larger bowl, Middle: cutting the corn off the cob. Right: All the kernels in the bowl are ready to be used.
If freezing the corn:
I like to place the kernels of corn on trays and let them dry and cool. Then I like to weigh out the kernels and put them in the bags or containers to freeze the corn. Then seal the bags or containers, getting as much or air out of the bags as possible. After that, I label each bag or container with the name, date, and weight of the corn before freezing the kernels. It should stay good in the freezer for a year.
If canning:
Prep your kitchen for canning, and then look at my post on pressure canning (Canning 201).
There are two methods to can corn: the hot pack method or the raw pack. I do the raw pack method. You will need water to bring water to a boil. You will need 1 cup of water for every 4 cups (quart) of corn. It is recommended you use clean water. I used the water that I blanched the corn in. I strain out the water by using a fine-mesh sieve. Then I measure the liquid and add water until I get the amount of water I need to fill the jars. Then I bring it to boil and let it boil for a minute.
Canning Risk Factor: It is recommended that you use clean water to can your corn. I like to use the water in which I blanched the corn because it adds more flavor to the canned corn.
Once the water has boiled, you can start loading the warmed jars with the kernels. I like to use a cup measure to fill the jars. It takes between 1 ½ to 2 cups of corn kernels to fill a jar leaving a generous inch of headspace. After that, add boiling water and a chopstick or Bubble Popper/Measurer to release the air bubbles in the jar and adjust the amount of liquid in the jar so that there is an inch of headspace in the jar. After doing that, clean the rim of the jar, place the lid, and tighten the band on the jar. Next, place the jar into the canner. Repeat this until all the jars are in the canner. Then, process jar at 10 PSI for 55 minutes for pint jars and 85 minutes for quart jars. Once the processing time is complete, turn off the heat and do not touch the canner; once it comes down to zero pressure, wait for another 5 minutes. Then, remove the cover and let the jars cool in the opened canner for 10 minutes; after that, remove the jars and let them rest on a towel or cooling rack untouched for at least 12 hours.

This jar is filled with corn and water, so it is ready for a lid and ring.
Final Thoughts on Preserving Corn:
This may seem like a lot of work to do for something that is so easily purchased in the grocery store. But it is worth it because the flavor and texture of the corn is so much better than the supermarket corn. I also enjoy the process, so I hope you try it in your mess.
")
Preserving Corn (freezing and Canning)
Ingredients
- Corn on the cob
- Water
Instructions
- Prepreparing the corn:
- If you plan to can your corn, prepare your canning equipment and your kitchen; seeCanning 101 andCanning 201 for more tips for your mess.
- You can start with as many corn cobs as you want to freezer or can. A good rule of thumb is about 8 medium corns for a quart of kernels.
- Start by husking the corn and getting rid of as much of the silk as possible.
- Inspect the cob to see if it has some rotten kernels or if there are many immature kerns, discard those cobs of corn.
- Then cut the tip of the corn off, which has the smaller, immature corn kernels on it. Afterward, cut off the stalk side of the cob as well and continue doing this until all the corn is ready to be blanched.
- Start by bringing a stockpot filled with water to a boil over medium-high heat.
- Next, fill a large bowl with ice and water for an ice water bath.
- Finally, set up a corn cutting station by putting a small bowl in a larger bowl that catches the corn.
- Once the water is boiling, place a few cobs in the stockpot and blanch for three minutes, and then remove corn to an ice bath to cool.
- Once the cob is cool enough to work with, place the cut tip of the corn on the smaller bowl; balance the cob on the bottom of the small bowl, ensuring it does not slip off the bowl. Then, use a chef's knife to cut the kernels off the cob. Do not scrap the cob. You only need ¾ of the kernel from the cob.
- Continue doing this until you get most of the kernels off all the cobs.
- Place the corn on trays and let them dry and cool.
- Then, weigh out the corn in the bags or containers.
- After that, seal the bags or containers, getting as much or air out of the bags as possible. Next, label the bags or containers with name, date, and weight, and then freeze the corn.
- It should stay good in the freezer for a year.
- Prep your kitchen for canning, and then look at my post on pressure canning (Canning 201).
- This is the raw pack method of canning corn.
- Therefore, you will need water to bring water to a boil, and you will also need 1 cup of water for every 4 cups (quart) of corn.
- It is recommended that you use clean water. * But, I prefer to use the water that I blanched the corn in. Hence, if you are using the blanching water, you will need to strain out the water using a fine-mesh sieve. After that, measure the liquid and add water until you get the amount of water you need. Then, you bring it to boil and let it boil for a minute.
- Once the water has boiled, you can start loading the warmed jars with the kernels.
- It takes between 1 ½ to 2 cups of corn kernels to fill a jar leaving a generous inch of headspace.
- Then add boiling water and use a chopstick or Bubble Popper/Measurer to release the air bubbles in the jar. You adjust the amount of liquid in the jar so that there is an inch of headspace in the jar.
- Then, clean the rim of the jar, place the lid, and tighten the band on the jar.
- Next, place them into a canner and repeat this until all the jars are in the canner.
- After that, process the jar at 10 PSI for 55 minutes for pint jars and 85 minutes for quart jars.
- Once the processing time is completed, turn off the heat and do not touch the canner; once it comes down to zero pressure, wait another 5 minutes.
- Then remove the cover and let jars cool in the opened canner for 10 minutes; remove jars and let them rest on a towel or cooling rack untouched for at least 12 hours.
- : It is recommended that you use clean water to can your corn. I prefer to use the water from which I blanched my corn because it adds flavor to the canned corn.